Back to Top
How to Assemble an IP55 Kiosk | Step-by-Step Guide

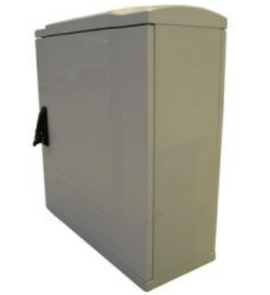
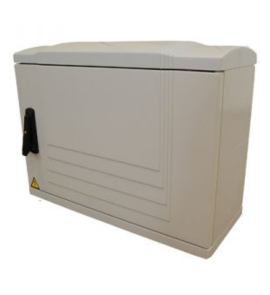
Perfect for electrical and commercial installations, our IP55-rated single door kiosks offer protection against dust and water—ideal for outdoor and industrial environments. These kiosks are delivered flat-packed for easy transportation, so in this article, we’ll walk you through how to assemble an IP55 flat-packed kiosk step by step. Want to see the full build in action? You can watch our assembly video on our website.
What is IP55
IP55 is part of the Ingress Protection (IP) rating system, which indicates how well a cabinet or enclosure resists dust and water.
- IP55 provides medium protection against water jets and dust ingress.
These flat-packed IP55 kiosks are designed for easy on-site assembly and long-term outdoor protection—making them ideal for electricians, contractors, and site managers who need durable, weather-resistant enclosures.
Step-by-Step Guide: Assembling Your IP55 Flat-Packed Kiosk
Side Panels Setup: Start by assembling the two side panels. The panel with the black seal should be on the right-hand side when facing the front. The pre-drilled holes (with inserts) should be at the back of the base plate.
Attach to Base: Use the screws to fix the side panels to the base. Leave the screws slightly loose for easier alignment later.
Apply Sealant Tape: Add 8x8mm sealant tape to the rear edge of the base plate. this helps ensure your IP55 enclosure maintains its weather-resistant seal.
Mount Rear Panel: Attach the rear panel to the sides and over the sealant tape. Insert screws at each corner—again, do not fully tighten.
Insert Dowels & Top Plate: Add the longer dowels to the top of the back panel. Then place and screw in the top plate securely.
Tighten All Screws: Once the structure is aligned, fully tighten all screws throughout the kiosk.
Secure Back Plate: insert and tighten screws on the back plate to complete the main body.
Door Assembly Instructions for Your IP55 Kiosk
Apply Weather Sealant: Apply sealant to three sides of the door frame—bottom, left and top. Proper application ensures your IP55 rating for water and dust protection is maintained.
Fit the Door: Push down the bottom hinges and align the door into grooves at the bottom and top corners. Rotate hinges 90⁰ to lock in place.
Install the Lock: Insert the brass fitting, slide the lock cover upwards, and turn the key clockwise to release the handle.
Close the Door: Pull the handle down to lock the door securely—completing your IP55 kiosk build.
Explore Our Full Range of IP55 Kiosks and Accessories
Explore the full range of options we offer? From various sizes to additional accessories, we provide high-quality, flat-packed IP55 enclosures designed for quick installation and long-term protection.
